Tuesday, May 18, 2010

Lemon Poppy Seed Cake


As school is slowly starting to wind down, teachers seem to want to pile more and more homework and projects on us poor students. But we won't let us bring that down! Three projects to finish in art? No problem! We'll just... stare at the wall. Talk. Listen to music. How do we manage to get anything done? To be honest, no one truly knows the answer to that...


Recently during art, my friend introduced me to some new music. Passion Pit. Crystal Castles. Check them out. While they might not suit everyone's taste, it's something new. Something different that I'm not used to listening to. Time to mix it up a bit! Nothing wrong with that.


On another note, soccer's done with. Over. Finito. Thankkgod. This season had gotten a bit... overwhelming. Time to celebrate our freedom! The freedom to go home after school, or do whatever else you'd like to do. And what better way to do that than bake a cake?


This cake. Holy heck. How to describe it?


Delicious. Scrumptious. Delectable. Yummy. Luscious. Succulent. The-most-tasty-thing-ever.

(No I did not just go all thesaurus on you... okay, maybe just a little.)


You will be drawn in. Captivated. Enthralled. Captured. By the pure beauty and intricacy of this cake. Have one piece and you'll be longing for more.


LEMON POPPY SEED BUNDT CAKE

Adapted from Joy the Baker


2 3/4 cup all-purpose flour

1 1/2 cup sugar

1 teaspoon baking soda

1 teaspoon salt

zest and juice from one large-ish lemon

1 1/3 cup canola oil (yes, you really need that much!)

1 cup buttermilk**

2 large eggs

1 teaspoon white vinegar

1 teaspoon vanilla extract

2 (heaping) tablespoons poppy seeds (depending on how much you like them...)

(**if you do not have buttermilk on hand at home, you can make a buttermilk-replacement by mixing one cup of milk with one tablespoon of lemon juice and let it sit for about five minutes, allowing the milk to curdle.)


For the Glaze...

about 3 tablespoon lemon juice (add more/less depending on the viscosity of the glaze)

1 1/2 cup powdered sugar

1/4 teaspoon vanilla extract

3 teaspoons milk


Preheat oven to 325°F. Thoroughly grease a 10-inch bundt pan.


Combine the flour, sugar, baking soda and salt. In a different bowl, whisk together the lemon, canola oil, buttermilk, egg, vinegar, and vanilla extract. Add the wet ingredient to the dry ingredients. Whisk until no lumps remain. Stir in the poppy seeds and pour the batter into the bundt pan. Insert into oven and bake for about 45 minutes, i.e. until a toothpick stuck in the center of the cake comes out clean.


Once out of the oven let the cake sit and continue to cook in the pan for another 20 minutes. Wait until it is almost completely cool (important! otherwise when attempting to remove cake it *could* fall apart. i speak from experience...) and then run a butter knife along the inside edges of the form to loosen the cake. Flip the cake unto a wire rack to completely cool.


When the cake is cool (i sped this up by placing it in the fridge. impatient impatient me), it's time to make the glaze. To do so measure out the powdered sugar into a small-medium bowl. Stir in the milk and vanilla extract, and then add enough lemon juice to produce a semi-thick liquid. You don't want the glaze to be too thin because otherwise it will run of the sides of the cake and not settle. On the other hand, you don't want it to be too thick because then it won't spread out, will be chunky and lumpy, and not spread out evenly over the top. Stir stir stir the glaze to get rid of any lumps. Then drizzle the glaze over the cake and allow to set (yet again, i sped this up by placing the cake in the fridge).


Now be ready to get rid of this cake quicker than you can blink. Everyone who had a piece couldn't stop eating and kept going back for more. It's light and fluffy texture and perfect tang of lemon added to an enticing sweetness make it simply irresistible. Your friends will, quite literally, be begging you for more.

Tuesday, May 11, 2010

Kitchen Karaoke (aka Chocolate Chip Cookies in the making)

Before we get down to business I just have to point out the rainbow that showed up a few days ago. Though faint in this picture it was beau-ti-ful! And this on my birthday. Thank you Mother Nature!


Occasionally there are those days where everything is just so completely and totally overwhelming. Whether it is good or bad, you just need to let go.

So why not enter your kitchen; turn on your favorite radio station; grab a spatula, a bowl, some eggs, butter, flour, and sugar; and belt out the lyrics along with the (probably more talented) artists. Throw the ingredients into a bowl and make some cookies. That spatula and whisk that you're using? They have multiple uses. You might not have known this until now, but they double as handy-dandy microphones. Embrace your inner superstar. How about you do a little dance while you're at it? Let out all that tension. Go ahead. Be crazy.


Now, about these cookies. I have officially started my quest to find the perfect chocolate chip cookie. The verdict on these? Not too shabby. While they are crisp around the edges they maintain a chewy center (that is taking into consideration that you don't leave them in the oven for too long...). Have I found the perfect recipe yet? Only time will tell. Until then... pour yourself a big glass of milk and chow down!


CHOCOLATE CHIP COOKIES

2 cups all-purpose flour
1 teaspoon baking powder
1 1/4 sticks butter
3/4 cup granulated sugar
3/4 cup packed light brown sugar
1 teaspoon table salt
2 teaspoons vanilla extract
1 large egg, plus 1 egg yolk
1 - 2 cups chocolate chips
3/4 cup walnuts (optional)

Preheat oven to 375°F.

Combine flour and baking powder in a bowl and set aside.

Put a stick of butter in a pan and heat on medium-low heat until it starts bubbling and is slightly brown. Add the remaining butter and stir until it is completely melted. Add the sugars, salt and vanilla extract and whisk together until smooth. Whisk in the egg. Let sit for a minute or two and then stir again. You want the batter to be a glossy, smooth mixture.

Stir in the flour until completely incorporated and then fold in the chocolate chips (and nuts).

Roll into little balls, approximately 1 inch in diameter. Flatten them out a little. (this will help them spread out and bake more evenly)

Bake for 10 - 15 minutes. Keep an eye on them! You want the bottom to be a nice light-golden brown. If the centers are slightly undercooked it's okay - this will result in chewy cookies!

Use a spatula to remove from baking sheet and put on a cooling rack to let completely cool. Serve with a glass of cold milk! Mmmm (:

Friday, May 7, 2010

The Story Of The Lonely Lemon


So there I was one not-so-beautiful night walking into my kitchen... and what do I see? One lemon. ONE. Sitting all alone and forlorn looking atop the microwave in the fruit bowl. Truly a heart wrenching sight.

Now I could not let myself just let it sit there all isolated from its fellow fruits. But a glance in the fridge showed that - very shockingly and depressingly - we were out of fruit! That, my friends, is a catastrophe.

So now there was only one thing left to do: I must use this lemon. This lemon, who has suffered through oppression by its human consumers, had constantly been ignored in favor of other, sweeter fruits. But once I was going to be done with it... no. No longer would that happen.

Which brings me (and you!) Lemon Bars. Sweet, tangy, lemon bars. Truly something that one could not ignore, nor pass up in favor of any other fruit. My testimony to you, oh lonely lemon, is complete.

(BTW- to all those wondering... That very night I sent my dad out to buy more fruit. All is back to normal.)


Look at those countertops... ughh. Yea, I desperately want new ones.

The batter will be crumbly at first...

...But press it down into the pan and voila! All is good.


The Final Product. Scrumptious.

LEMON BARS

Crust:
1/2 cup (1 stick) unsalted butter, room temperature (i.e., soft. TIP: if you take the butter directly out of the fridge put it in the microwave for 30 seconds at 50% power it will produce the desired effect. The 50% power is key for it will heat the butter more evenly.)
1/4 cup powdered sugar
1 cup all-purpose flour
big pinch of salt

Lemon Filling:
1 cup granulated sugar
2 large eggs
zest and juice from 1 lemon: that's about 2 tablespoons of zest and 1/4 cup of lemon juice
1 tablespoons all-purpose flour

Start by making the crust. (As is logical...) To do so, preheat the oven to 350°F with the oven rack in the center of the oven. Butter an 8x8 in pan. And theennnn....

In a medium sized bowl beat together the eggs and sugar. Next add the flour and salt and beat until the dough is just combined. It will be very crumbly and look quite dry. No worries. Dump the entire bowl into the pan, spread out evenly and then press down into the bottom of the pan. Make sure not to press down too hard because otherwise you will have slight difficulties getting the bars out in the end. Bake the crust for about 20 minutes, until the edges are a light brown. Make sure to not leave it in too long! Place on a wire rack to cool while you commence to prepare the filling.

Start making the filling by once again beating together the eggs and sugar until it is nice and smooth. Add the lemon zest and juice and beat until a homogenous mixture is made. Fold in the flour (and then beat again slightly to incorporate any leftover dry ingredients). Pour the filling onto the cooled crust. It will be very liquidly but will become more dense while baking. Put into oven and bake for about 20 minutes, until the top of the bars have a nice light brownish/golden-yellowish skin on top. Remove from oven and place on a cooling rack to cool completely. (I put them in the fridge to help aid speeding up the cooling time.)

Once completely cooled cut the bars into desired sizes of squares and, using a spatula, remove from pan. Place on a plate or cooling rack and sprinkle with powdered sugar. Then commence to give to people who deserve such a delectable treat. Yum!

Thursday, May 6, 2010

Banana Cream Pie


It's May. The sun is shining. The flowers are blooming. The birds are chirping and everything is just soooo nice right now. Well, it was when this post was SUPPOSED to be posted. I'm a bit of a procrastinator... not to mention all the things that I have going on right now. So let's just ignore all the going ons of life at the moment and just ENJOY ourselves! Time to indulge in a Banana Cream Pie.
Ready? Go!

(P.S. : From the second that I put the finished pie out on the countertop to be consumed until the point that it was completely scarfed down was less than 48 hours. So don't be shy if you want a piece! Go ahead and cut yourself a big slice. You won't regret it.)


BANANA CREAM PIE
Adapted from Joy The Baker

TART CRUST:

1 1/2 cups all-purpose flour

1/2 cup powdered sugar

1/4 teaspoon salt

9 tablespoons (that's 1 stick + 1 tablespoon) unsalted butter, frozen and cut into cubes

2 egg yolks


FILLING:

2 cups milk

6 egg yolks

1/2 cup light brown sugar

1/3 cup sifted cornstarch

pinch of salt

1 teaspoon pure vanilla extract

3 tablespoons unsalted butter


3 ripe bananas, sliced

OPTIONAL: if you want you can also add strawberries, in which case downsize to two bananas and add about ten fresh strawberries, sliced.


TOPPING:

Tablespoon cocoa

&

Whipped cream out of a can

-OR-

1 cup heavy whipping cream

2 tablespoons powdered sugar

1 teaspoon vanilla extract


TO MAKE THE CRUST:

Butter a 9-inch pie pan (i used a fluted pan with removable bottom - the removable bottom is the best. It allows for easier removal of the pie from the pan later on. lovelovelove it!! )


Combine the flour, powdered sugar, and salt in a bowl. Beat together with a mixer until combined. Distribute the butter over the mixture and blend with the mixture until it is coarsely cut in. Different sizes of butter will be present in the dough. Beat the egg yolk and add it little by little to the mixture. Mix the dough until it starts to form clumps. Knead the dough just enough to incorporate any dry ingredients that may have managed to have not been mixed in.


Evenly press the dough into the pan, making sure to cover the bottom and sides. You want the pieces to cling to one another, but not to combine it all together into one big mass for you want it to maintain its crumbly texture. Freeze for at least 30 minutes before baking.


When ready to bake:

Preheat oven to 375°F. Butter the shiny side of a piece of foil and put the foil (butterside down) tightly against the frozen crust. This is to help prevent the crust from rising. Bake for about 25 minutes. Carefully remove the foil and then return to oven to bake for another 8 to 10 minutes. Keep an eye on the crust for it tends to brown quickly. When done remove from oven and let cool completely before filling.


TO MAKE THE FILLING:

Bring the milk to a boil in a small saucepan. WATCH THE MILK. Milk has a lower boiling point and will therefore boil quicker and tends to boil over if not watched.


While the milk is being heated, whisk together the yolks, brown sugar, cornstarch, and salt in a large, heavy-bottom saucepan. The mixture will be very thick. Continue whisking and slowly pour about 1/4 of the milk into the mixture, this is to warm the eggs so that they don't cook and curdle. Continue adding the milk whilst always whisking.


Place the pan on medium heat and continue whisking (just keep whisking just keep whisking just keep whisking whisking whisking...) and bring the mixture to a boil. Boil for about a minute and keep whisking and then remove the pan from the heat. (TIP: the custard will start to thicken quickly once it starts to boil. Feel free to remove it from the heat for a little to whisk it smooth before continuing.)


Add in the vanilla extract and let it sit for five minutes. Then add in the butter and stir until it is completely incorporated and the custard is smooth and silky. Put the custard in a medium bowl, cover with a wrap so that the plastic touches the surface, and then put in the fridge until it is completely cool throughout. (Custard can be refrigerated up to three days. Personally, I loved custard. So you can either decide to just make the custard and eat it plain, or to make extra to eat at some later time... or whilst baking the pie!)


When everything has cooled then you're finally ready to assemble the pie! Slice the bananas (and strawberries if you want) and whisk the custard to loosen it up a bit. (Yes, there IS a lot of whisking involved in making this pie! Don't worry, it's totally worth it.)

Add a handful of BANANAS to the custard filling and fold in.

Arrange a layer of banana slices (and strawberry slices) on the bottom of the crust. Pour the custard on top of that. Smooth it out and put it in the fridge until ready to serve, at which point you will be adding whipped cream.


TO MAKE THE TOPPING:

There are two possibilities:


1) You can be lazy like me and just use whipped cream out of a can. That works wonders. Simple. Elegant. What more could you ask for?

2) You can choose to be a bit more productive in the kitchen and make your own whipped cream topping. For this scenario you will need to pour the whipping cream into a bowl. Add the powdered sugar and vanilla extract and with a hand mixer whisk (MORE WHISKING! [; ) until it is stiff.


Put on top of pie. Sprinkle with a little cocoa for looks. Put in front of family member/friend/human and be ready to be worshipped. Easy as pie.


This is what the pie should look like before it is frozen...

...And this is what it looks like when it's been baked.

Oh the joyous custard... Yum. Look at that steam! That stuff is legit.


AAAANNNDDDD the final masterpiece. Dig in!


Sunday, May 2, 2010

Strawberry Banana Smoothie


It is officially May. I love May. Lovelovelove. The flowers are bloomin' everywhere and it's FINALLY warm enough outside to wear shorts five consecutive days in a row. (Plus the fact that my birthday is in a week... what is there not to love?) Beautiful.

Not only is the weather fitting for the beginning of May, it's perfect for playing soccer. Which is why I was to be found at school at 8:45 on a Saturday morning. Our opponent: some team called Leyden. I'd go on to describe the team, but then all this post would end up saying would be variations of "@#$%!!!". Let's just say that they loved profanity, they loved attacking my sprained ankle, and some girl spat on me.

Now, if this weren't bad enough, the ref decided to give ME a yellow card. Preposterous! Apparently squealing out in pain after having your sprained ankle tackled and then moving back to your position, listening to some opponent curse you out, and going to mark your player is "laughing and then walking away" and "un-sportsmanship like conduct". At first I had thought yes, that girl is getting what she deserves! ...and then the card was given to me. What a moron ref.

After all that, I was prettttyyy ticked off. Not having much appetite, but still needing to eat something, I decided to brighten up my day by sticking with the spirit of spring and making myself a smoothie. So I threw together some fruits and dairy products and voila! A refreshing and delicious drink to quench my thirst, satisfy my stomach, and bring back a dwindling good mood.

STRAWBERRY BANANA SMOOTHIE

1-2 bananas
about 1/2 cup Greek Yogurt
1 cup milk
1 tablespoon heavy whipping cream
2 teaspoons vanilla extract
a large handful frozen strawberries (approximately 1 1/2 cup) (TIP: if you'd prefer you can use fresh strawberries, be sure to add the 1 cup of ice cubes to the mixture)
OPTIONAL: about 1 cup of ice cubes

Cut the banana into slices. Throw everything into a blender. Mix together until everything is blended and you have achieved a smooth texture. (If you added ice, there should be small chunks of ice in the drink.) Pour into a glass and consume.

My dog Roxy seemed pretty interested in what all the commotion in the kitchen was about. She came to investigate and was eyeing the smoothie... Sorry Roxy, but dogs shouldn't drink this! (Don't worry, I wouldn't just not give her anything: in the end I gave Roxy some treats that she greedily inhaled.)

Wednesday, April 28, 2010

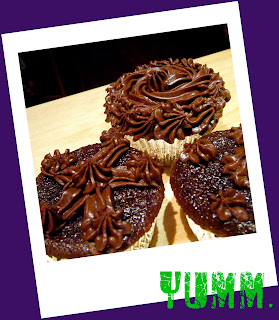
Simple Yet Extraordinary: Perfectly Chocolate Chocolate Cupcakes (Get Well Ethan!)


Ohhhh boy. What a week. Does it sometimes seem like the world is out to get you; as if Karma has decided to pay you back for all the bad you’ve done all at once? This week is a continuation of a previous bad week, and has already been filled with raging mothers, raging coaches, raging hormones, and ragingly bad grades and even worse news.

It all started out on Monday with a math test. Who understands those pesky geometric formulas and theorems anyway? I mean unless I want to find the lateral surface area of one of my cakes, I see no reason why I would use them. I don’t need any of those fancy number crunching, life-complicating formulas. Now you may ask yourself: How bad did I do? Well, let’s just say that I didn’t manage to finish most of the problems in the allotted forty minutes time…

After that, the week just kept going downhill. I don’t know what it was, but someone must have slipped grouchy pills into the drinks of all the adult females in the general area. Not only were there unpleasant situations in the classroom, but also on the soccer field and at home. Seems like there’s always something to be reprimanded about. I’m sorry we can’t all always be perfect, ma’am.

The real killer day came on Tuesday. On Monday I had injured my ankle in the soccer game against Highland Park, and when I talked to the trainers they confined me to crutches. I strongly detest crutches… with a fiery passion. Not only do I already hate being injured and unable to play, but crutches add insult to injury. They make me feel vulnerable and useless; everyone is always asking “What happened?”, “Are you okay?”, and the ultimate killer: “Do you need help?”. I do not enjoy being your charity case; I can take care of myself. If I need help then I’ll ask for it. Until then, keep out of my way.

If that wasn’t bad enough, my best friend Ethan had a pole-vaulting accident and was sent to the hospital. He is currently doing relatively okay, he’s resting at home, but of course I was (and still am) worried sick.

After all this, I knew that something simple yet extraordinary was to be made to cheer Ethan (and myself) up. For that is the kind of person that Ethan is: Simple yet extraordinary. The bestest friend anyone can find. Following careful consideration, I decided to make cupcakes. For what’s better than chocolate cupcakes?

These cupcakes are incredibly moist and rich. I recommend finding someone, or several someones, to share these with; otherwise temptation might grab hold of you and lead you to greedily devour a whole batch by yourself. This recipe is quite literally cake batter poured into a muffin pan and then generously frosted so that everyone gets their own individual little cake. Of course if you’d prefer to make this into an actual cake, you are more than welcome to do so.

And once again, GET WELL ASAP ETHAN!

PERFECTLY CHOCOLATE CUPCAKES

From Hershey’s Kitchen Recipes

For the Cupcakes:

2 cups sugar

1 ¾ cup all-purpose flour

¾ cup baking cocoa

1 ½ tsp baking powder

1 ½ tsp baking soda

1 tsp salt

2 eggs

1 cup milk

½ cup vegetable oil

2 tsp vanilla extract

1 cup boiling water

§ Preheat oven to 350°F.

§ Distribute baking cups into two muffin pans (12 muffins each, 24 total).

§ Combine and mix together the sugar, flour, cocoa, baking powder, baking soda, and salt in a bowl. Add the eggs, milk, oil, and vanilla extract.

§ Blend well with a blender on medium setting for approximately two minutes. Add in the boiling water and mix until you get a smooth, even mixture. (NOTE: the mixture will be very thin, this is desired)

§ Pour the batter into the pan, filling each cup about 2/3 of the way. (TIP: To do this I first poured the batter into a measuring cup with a spout so that it was then easier to accurately pour the batter into the cups.)

§ Bake for 20 – 25 minutes; until a toothpick inserted in the center of a muffin comes out clean.

§ Let the cupcakes cool slightly, and then move them to a cooling rack to cool completely before frosting.

NOTE: If you decide that you want to make a cake (which the recipe originally calls for), you can either pour the batter into a 13x9 pan and bake for ≈35 minutes. For a double layer cake butter two round 9-inch pans and then evenly divide up the batter between the two pans. Bake for ≈30 minutes. Let cool completely and then frost. Serve and enjoy, and be forever worshipped!

For the Frosting:

1 stick butter

2/3 cup baking cocoa

3 cups powdered (confectioners) sugar

1/3 cup heavy whipping cream (you can also use milk)

1 tsp vanilla extract

Melt the butter and then stir in the cocoa. Alternating between adding the sugar and cream until it becomes a smooth, light brown mixture. Add the vanilla extract. Use to frost cupcakes or cake. Also take the time to indulge in licking the spoon and bowl clean. One can never be too old to lick clean the baking supplies!


Sunday, April 11, 2010

Scrumptious Sugar Cookies

Sugar cookies seem to be a common favorite amongst the general population. You see them at birthday parties. One will encounter them at meetings. They are spotted at potlucks. I can safely say that a sugar cookie is a simple yet magical creation.

These tasty morsels become quite handy when one is put in tricky situations. Get in a fight with your boyfriend? Why not just bake up a batch of these sugary delights. I assure you that once he has a bite of these babies he’ll be begging for more, and begging for forgiveness (even if it was you that did wrong). It works with Eric every time. ;]

Even if you aren’t in a fight, I assure you that your significant other will love indulging in a batch of cookies made by you. Everything tastes better when made with love by someone special.


SUGAR COOKIE RECIPE

3 cups sifted all-purpose flour 


1 ½ teaspoons baking powder 


½ teaspoon salt 


1 cup white sugar

1/8 cup brown sugar

1 ½ sticks butter 


1 egg, lightly beaten 


3 tablespoons cream (if you don’t have cream you can use milk)

1 ½ teaspoon vanilla extract

Sift together all-purpose flour, baking powder, sugars, and salt.

Add the butter and mix until crumbly.

Stir together the lightly beaten egg, vanilla, and cream. Add to the dry ingredients and blend well. Gather the dough into a ball and put in the fridge. Let it chill for at least an hour for easier rolling.

Preheat oven to 400°F.

On a floured surface roll out the dough to ¼ inch thickness (for crispier cookies make it slightly thinner, for chewier ones slightly thicker). Cut into shapes. Place on a lightly buttered cookie sheet. If desired sprinkle with sugar crystals.

Bake for 6 - 8 minutes, or until lightly brown on the bottom. They might still be a bit uncooked in the middle, but when they cool this will result in them being chewy. Place the cookies on a wire cooling rack.

Once cool the cookies are ready for you to enjoy immediately or to decorate! Have fun!